
Introduction
In the world of personal expression, nail art stands out as a colorful and creative outlet. Your nails are not just a canvas; they reflect your personality, mood, and style. As spring unfolds, it brings along a burst of vibrant colors and fresh inspiration, making it the perfect time to experiment with charming nail art designs. This season is all about embracing the beauty of nature and the joy of renewal, and what better way to celebrate it than through DIY nail art? In this article, you’ll discover easy-to-follow designs that you can create right at home, allowing you to elevate your style and celebrate the essence of spring. So, gather your nail supplies, unleash your creativity, and let’s dive into the delightful world of spring-themed nail art!
“Creating a cozy reading nook is all about maximizing comfort in a small space. It’s about intentional design that serves both function and feeling.”
– Interior Design Magazine
Spring Color Palettes
Spring is synonymous with a refreshing palette of colors that can invigorate your nail art game. This season, expect to see a plethora of pastels and bright floral hues dominating the scene. Soft pinks, baby blues, mint greens, and sunny yellows are just a few of the shades that evoke the essence of spring. You might also want to consider combining these colors for a more vibrant look. For example, a pastel pink paired with a bright yellow can create a cheerful and uplifting design.
When choosing your color palette, consider your skin tone to ensure that your nails complement your overall look. Warm skin tones often shine in peachy shades, corals, and creamy pastels, while cooler skin tones may prefer soft blues, lavender, and silver.
Here’s a handy table showcasing some popular spring color combinations and the skin tones they complement:
| Color Combination | Best For | Suggested Brands |
|---|---|---|
| Pastel Pink & Mint Green | Warm Skin Tones | Essie, OPI |
| Lavender & Soft Blue | Cool Skin Tones | Butter London, Zoya |
| Coral & Yellow | Neutral Skin Tones | China Glaze, Sally Hansen |
For high-quality spring shades, you might want to explore brands like Essie, OPI, and Sally Hansen. They offer a wide variety of colors that are perfect for creating stunning nail art.
Floral Nail Art Designs
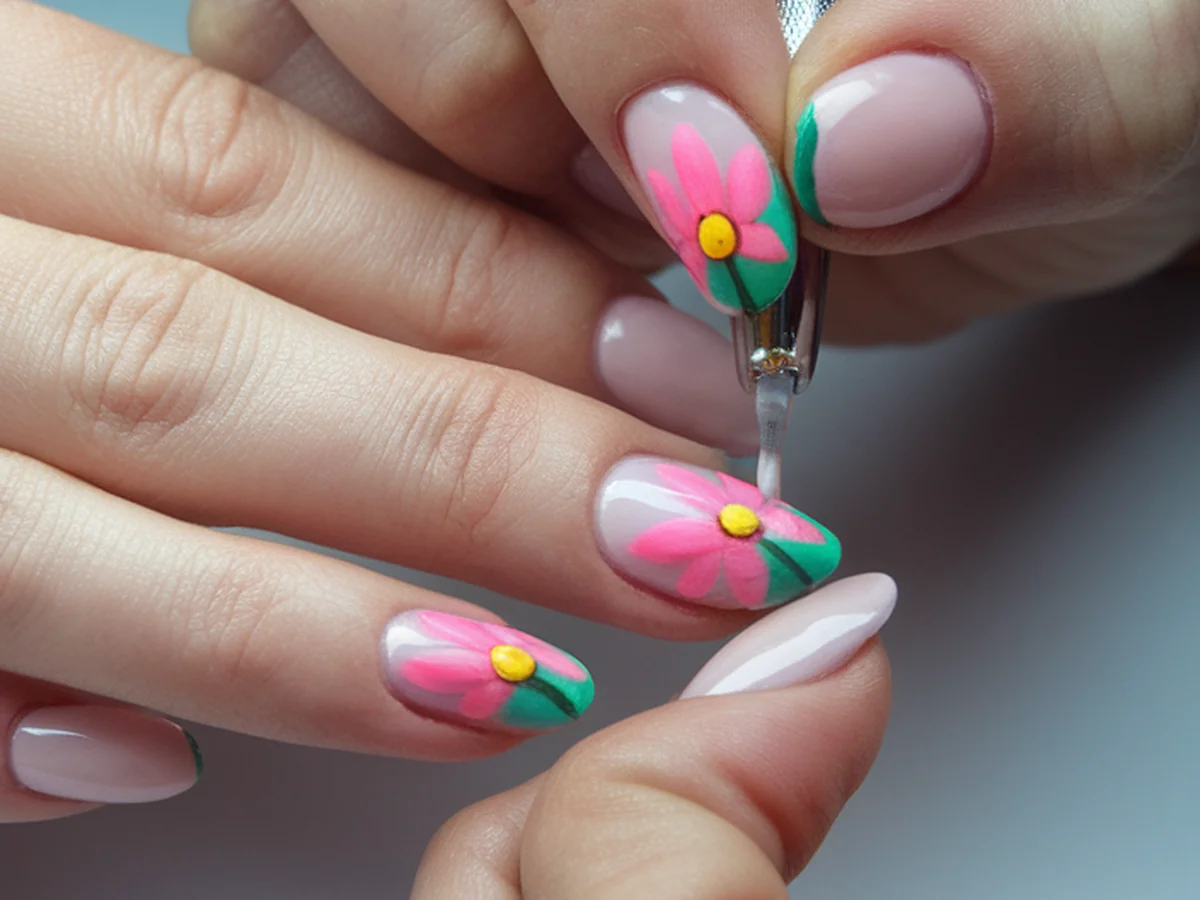
Nothing says spring quite like floral designs, and they’re surprisingly easy to create at home! Start with a base coat of your chosen pastel or vibrant color. Once it’s dry, you can begin crafting your flowers. For simple flower designs like daisies or tulips, you’ll need a few essential tools: dotting tools, nail art brushes, and perhaps a fine-tipped brush for details.
Step-by-Step Guide for Daisies:
1. Apply a white base coat and let it dry completely.
2. Using a dotting tool, create small dots in a circular pattern for the petals.
3. Add a yellow dot in the center for the flower’s heart.
4. Finish with a top coat to seal your design.
You can also incorporate real flower patterns by using pressed flowers. Simply place a dried flower on your painted nail and seal it with a clear top coat. This can give your nails a unique and organic look.
To achieve a professional finish, ensure each layer is completely dry before moving on to the next. Patience is key in nail art!
Geometric Patterns for a Modern Twist
Geometric nail art is all the rage, offering a modern and chic aesthetic. The appeal of geometric designs lies in their clean lines and bold shapes, which can be tailored to fit your personality. You can create basic geometric shapes such as triangles, stripes, or chevrons.
Guide to Creating Geometric Patterns:
1. Start with a solid base coat in a neutral or pastel shade.
2. Use painter’s tape to outline your desired shapes on the nail, ensuring the edges are pressed down firmly.
3. Paint over the tape with your chosen color for the shapes, and once dry, carefully peel the tape away for clean lines.
For color schemes, consider using two or three complementary shades that reflect spring’s vibrancy, such as soft pinks, yellows, and blues. This design not only looks stylish, but it’s also perfect for those who appreciate a bit of minimalism in their nail art.
Ombre Effects for a Gradual Transition
Ombre nail art is versatile and can be adapted to any season, making it a fantastic choice for spring. The gradual transition of colors can mimic the beautiful gradient of a sunset or the softness of blooming flowers.
Step-by-Step Tutorial for Ombre Effect:
1. Choose two or three colors that blend well together, such as light pink, lavender, and white.
2. Apply a base coat of the lightest color and allow it to dry.
3. Use a makeup sponge to dab on the second color, starting from the tip and working your way down. Blend it into the base color for a seamless transition.
4. Repeat with the third color if desired, and finish with a top coat to secure the design.
To ensure longevity, seal your ombre design with a quality top coat, which not only protects the colors but also adds a glossy finish.
Animal Prints with a Spring Flair
Animal prints are always in style, but this spring, consider infusing them with a fresh twist. Trends like floral leopard or pastel zebra can bring a fun and unexpected element to your nail art.
Instructions for Subtle Animal Print Designs:
1. Paint your nails with a base coat in a light pastel shade.
2. Using a thin brush, create small, irregular shapes to mimic spots or stripes in a contrasting color.
3. You can also add floral touches within the prints to harmonize with the spring theme.
Mixing and matching animal prints with floral designs can create a unique and cohesive look. For example, you could have a floral design on most nails and an accent nail with animal print to tie everything together.
Accent Nails: Highlighting One Design
The accent nail trend is a fantastic way to showcase a special design without overwhelming your entire manicure. This approach allows one nail to stand out, drawing attention and creating a focal point.
Choosing Your Accent Nail:
Typically, the thumb or ring finger is chosen as the accent nail. Consider using a more detailed design, such as intricate floral art or a glitter finish, on this nail while keeping the others simple.
It’s important to coordinate your accent nail with the overall design. For instance, if your base color is a soft pink, a vibrant floral or a glittery gold accent can beautifully contrast.
Using Nail Stickers and Decals
If you’re short on time or just want a quick solution, nail stickers and decals can be a game-changer. They come in a variety of spring-themed designs, from florals to insects, making them perfect for seasonal nail art.
How to Apply Nail Stickers:
1. Start with a base coat of your desired color and allow it to dry.
2. Carefully peel the sticker from its backing and place it on your nail.
3. Press down firmly and seal with a clear top coat for durability.
Layering stickers with painted designs can create a more dynamic look. For instance, you could paint a vibrant base color and then apply a delicate floral sticker for added detail.
Finishing Touches: Top Coats and Care
No nail art is complete without the right finishing touches. Using a good top coat is essential for longevity and shine. It not only protects your designs but also enhances their beauty. Quick-drying, chip-resistant top coats are especially beneficial for those who are always on the go.
Here’s a quick table of recommended top coats:
| Top Coat | Features | Best For |
|---|---|---|
| Sally Hansen Miracle Gel | Chip-resistant, gel-like finish | Long-lasting wear |
| Seche Vite | Quick-drying, high shine | Speedy applications |
| Essie Gel-Setter | Glossy finish, strengthens polish | Everyday wear |
Additionally, maintaining your nails is crucial, especially during the spring when your hands can be exposed to various elements. Make sure to moisturize your cuticles regularly and file your nails to keep them healthy and strong.
Conclusion
Spring nail art is an exciting way to express your creativity while embracing the beauty of the season. From floral designs to modern geometric patterns, there’s no limit to the charming ideas you can explore. I encourage you to experiment with different techniques and color combinations, making your nail art journey a delightful spring tradition. Don’t forget to share your completed designs on social media, inspiring others to join in on the fun! Nail art is more than just aesthetics; it’s a celebration of style, personality, and the joy of creativity. So, grab your nail supplies and let your imagination bloom this spring!
Frequently Asked Questions
What are some beginner-friendly nail art techniques?
For beginners, starting with simple techniques is key. Dotting tools are a great way to create flowers and patterns, while using painter’s tape can help with geometric designs. You might also consider stickers and decals for a quick and easy way to add flair to your nails without extensive skill.
How can I make my nail art last longer?
To increase the longevity of your nail art, always start with a base coat and finish with a high-quality top coat. Avoid exposure to harsh chemicals and wear gloves when cleaning or gardening. Regular maintenance, such as moisturizing your cuticles, can also keep your nails looking fresh.
Can I mix different nail art styles on one manicure?
Absolutely! Mixing different styles can create a unique and personalized look. For instance, you can have a floral design on most nails and an accent nail featuring a geometric pattern. This approach allows you to showcase your creativity and make a statement.
What supplies do I need for DIY nail art?
Basic supplies include nail polish in your chosen colors, a base coat, top coat, dotting tools, nail art brushes, and painter’s tape. Depending on the design, you may also want nail stickers or decals. Investing in good quality tools can make a significant difference in the outcome of your designs.
How often should I change my nail art?
This largely depends on your personal preference and lifestyle. If you enjoy changing your nail art frequently, you might opt for weekly changes. However, if you prefer to maintain a design for longer, consider refreshing your nails every two weeks, especially if you notice chipping or wear.