
Introduction
Outdoor spaces have become essential sanctuaries for relaxation and enjoyment, offering a respite from the daily grind of life. Whether you have a sprawling garden or a cozy balcony, the ambiance of your outdoor area can greatly influence your mood and well-being. One of the most effective ways to enhance both the aesthetics and functionality of your garden is through thoughtfully designed pathways. Pathways not only guide visitors through your outdoor space but also add an artistic element that can truly transform the area.
The beauty of creating pathways is that you don’t need a hefty budget to achieve stunning results. DIY projects are more accessible than ever, allowing you to unleash your creativity while staying within your financial means. With a bit of imagination and a willingness to get your hands dirty, you can personalize your outdoor design, turning mundane spaces into vibrant havens. In this article, we will explore budget-friendly DIY pathway creations that will elevate your outdoor space, making it a place of beauty and serenity.
“Creating a cozy reading nook is all about maximizing comfort in a small space. It’s about intentional design that serves both function and feeling.”
– Interior Design Magazine
Understanding the Basics of Pathway Design
Understanding the purpose of pathways is crucial when planning your outdoor space. They serve as the veins of your garden, providing navigation and enhancing aesthetics. A well-designed pathway can guide guests through your landscape, leading them to focal points like flower beds, seating areas, or a tranquil pond. Moreover, pathways improve accessibility, ensuring that everyone can enjoy your outdoor space without obstacles.
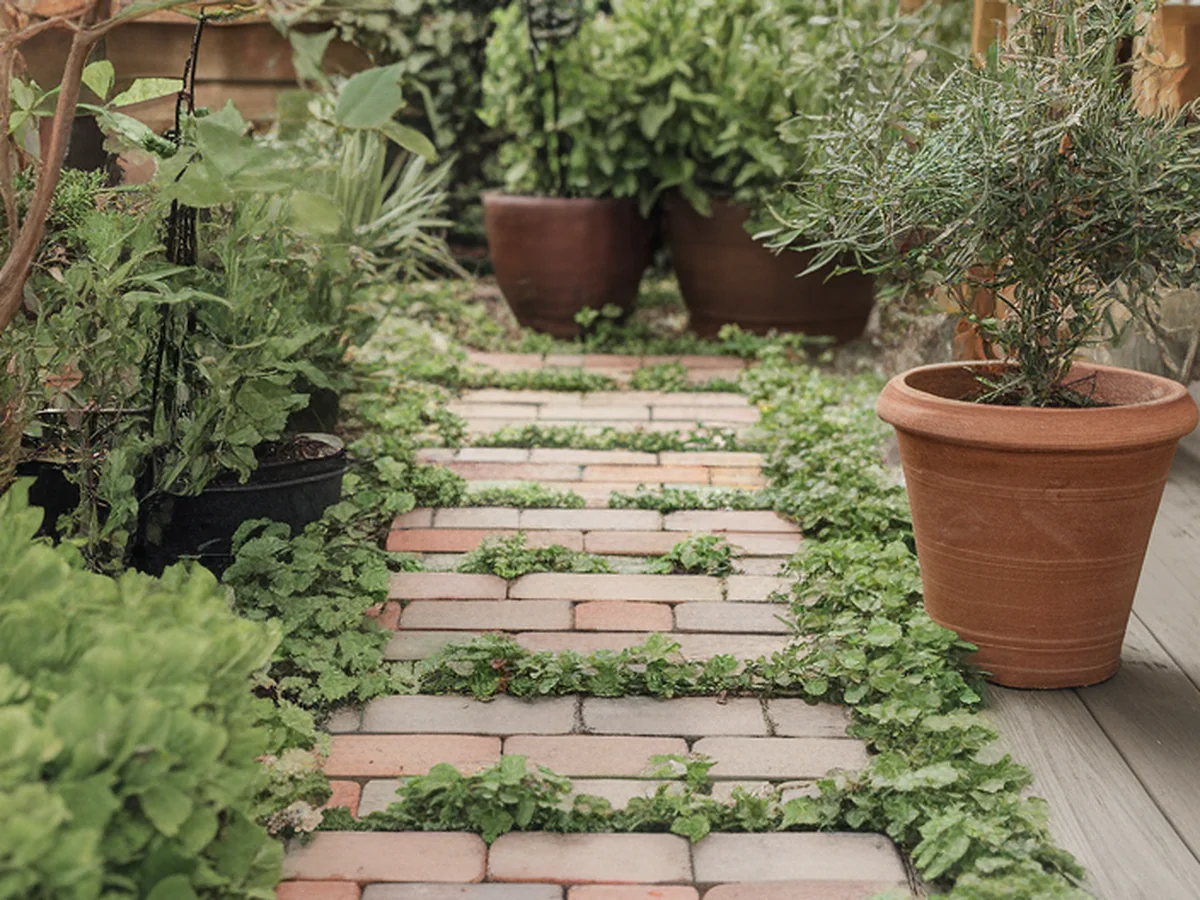
There are various types of pathways to choose from, each with its unique features. Gravel pathways offer a rustic charm and excellent drainage, while stone paths provide a timeless elegance. Wooden pathways can add a warm touch, perfect for a natural setting. The materials you select will depend on your style, budget, and the overall theme of your garden.
When designing your pathway, consider key factors such as width, layout, and materials. A pathway should be wide enough for comfortable navigation but not so wide that it overwhelms the space. The layout can be straight or curved, depending on your garden’s shape and existing features. To assess the available space, take a walk through your garden and visualize where a pathway would fit best. Use stakes and string to outline your design, allowing you to visualize the flow before committing to a permanent structure.
Budget-Friendly Materials for Pathway Creation
Creating a beautiful pathway doesn’t have to break the bank. Many budget-friendly materials can add character and functionality to your outdoor space. Here are some common materials to consider:
| Material | Cost-Effectiveness | Characteristics |
|---|---|---|
| Reclaimed Wood | High | Eco-friendly, versatile, rustic |
| Bricks | Moderate | Durable, classic, available in various colors |
| Gravel | High | Good drainage, easy to install, customizable |
| Concrete Pavers | Moderate | Sturdy, available in various designs |
You can source these materials from local suppliers or online marketplaces, often at discounted prices. Additionally, consider the benefits of using natural materials over synthetic options. Natural materials typically blend better with the outdoor environment and require less maintenance. Furthermore, don’t overlook the potential for upcycling materials from around your home or yard. Old bricks, leftover wood, or even stones can be creatively repurposed, adding a personal touch to your project.
Planning Your Pathway Layout
Once you have determined the materials you will use, planning your pathway layout is the next crucial step. Start by sketching your design on paper. This doesn’t have to be perfect; the goal is to visualize how the pathway will flow through your space. Be sure to consider the existing features in your garden, such as trees, shrubs, and flower beds, as these can influence the shape and direction of your pathway.
When planning the layout, think about flow and accessibility. A well-placed pathway should invite exploration and make it easy for guests to navigate your garden. Creative shapes, like meandering curves or geometric patterns, can add visual interest. Consider integrating your pathway with existing garden features, such as planting low-maintenance flowers or shrubs along the edges to create a natural frame.
Using materials like mulch or decorative stones alongside your pathway can also enhance its appearance and functionality. This added detail can help define the pathway and provide a clean transition from the path to the surrounding garden.
Step-by-Step Guide to Building a Gravel Pathway
Building a gravel pathway is one of the most straightforward and budget-friendly options. Here’s a step-by-step guide to help you create your own:
1. Gather Necessary Tools and Equipment: You will need a shovel, rake, landscape fabric, edging materials (if desired), and of course, gravel. Depending on your design, a wheelbarrow may also be helpful.
2. Excavate the Pathway Area: Begin by marking the outline of your pathway with stakes and string. Dig down about 4 to 6 inches along the path, ensuring the ground is level and free of debris.
3. Install Landscape Fabric: Lay landscape fabric in the excavated area to prevent weeds from growing through the gravel. Cut the fabric to fit, and secure it with landscape pins.
4. Add Edging (Optional): If you prefer a defined edge, install edging materials around the pathway. This can be wood, stone, or metal, depending on your aesthetic preference.
5. Place the Gravel: Pour the gravel onto the landscape fabric, spreading it evenly with a rake. Aim for a depth of about 3 inches, allowing the gravel to settle into place.
6. Compact the Gravel: Use a tamper to compact the gravel, ensuring it is stable and level.
7. Maintenance Tips: Regularly rake the gravel to maintain an even surface and refill any areas that have settled. To keep weeds at bay, consider applying a weed killer or adding a fresh layer of gravel annually.
8. Address Drainage: Ensure your pathway has proper drainage to prevent erosion and pooling. If needed, create a slight slope or add drainage channels to direct water away from the path.
Creating a Stone or Paver Pathway
Stone and paver pathways can elevate the elegance of your outdoor space significantly. Here’s how to create a beautiful and durable stone or paver pathway:
1. Select Your Materials: Choose from a variety of stones or pavers that complement your garden style. Options may include flagstone, slate, or concrete pavers, each offering distinct aesthetics.
2. Prepare the Area: Just like with gravel, mark and excavate the pathway area, removing any sod and debris to create a flat surface. Aim for a depth of about 4 to 6 inches.
3. Lay a Base: Depending on the material you choose, you may need to add a layer of sand or gravel to create a stable base. Spread and level this base layer before proceeding.
4. Arrange the Stones or Pavers: Begin placing your stones or pavers in your desired pattern. Consider using a mix of sizes for a more organic look. Leave small gaps between the stones for drainage and to allow for plant growth.
5. Secure the Stones: Once you are satisfied with the arrangement, fill the gaps with sand or soil to hold the stones in place. If using pavers, consider applying a polymeric sand, which hardens when wet, preventing weeds.
6. Grout and Seal: If desired, you can grout the spaces between your pavers for a finished look. Sealing your stones or pavers can enhance their color and protect them from moisture.
7. Add Borders: To give your pathway definition, consider adding borders using bricks or stones along the edges. This not only enhances the aesthetic but also helps to keep the pathway material contained.
Incorporating Natural Elements in Pathway Design
Integrating natural elements into your pathway design can create a harmonious blend between your garden and the pathways. Plants can serve as excellent frames, softening the edges and adding color throughout the seasons.
Consider planting low-maintenance species such as lavender, thyme, or creeping phlox along the sides of your pathway. These plants not only thrive in most conditions but also provide fragrance and attract pollinators, enhancing your outdoor space’s ecosystem.
In addition to plants, decorative stones or mulch can be used alongside the pathway to create texture and interest. These natural elements can also help with weed control and soil retention.
As seasons change, think about how your pathway can adapt. For instance, in spring, blooming flowers can bring vibrancy, while autumn leaves create a warm, inviting atmosphere. Regularly reassess your pathway and the plants surrounding it to ensure they continue to thrive and enhance your outdoor design.
Lighting and Accessories for Pathways
Lighting plays a crucial role in enhancing the usability and aesthetic appeal of your pathways, especially in the evening. Pathway lighting not only illuminates the way but also creates ambiance and safety for nighttime strolls.
Consider budget-friendly lighting options such as solar-powered lights, which are easy to install and require no wiring. Lanterns or string lights can add a charming touch, creating a cozy atmosphere. Position lights along the edges of your pathway to highlight the design and ensure safety.
In addition to lighting, decorative accessories can personalize your pathways. Stepping stones, garden art, or even whimsical sculptures can serve as focal points, inviting guests to explore your garden further.
When designing your lighting and accessories, aim for a cohesive look that complements your overall garden design. Layering different lighting types can create depth and interest, transforming your outdoor space into a magical haven after dark.
Maintaining Your DIY Pathway
Regular maintenance is key to ensuring the longevity and appearance of your DIY pathway. A well-maintained path not only looks better but also functions effectively, enhancing the overall experience of your outdoor space.
Start by creating a seasonal checklist for pathway upkeep. This can include tasks such as:
- Raking gravel or sand to maintain an even surface
- Removing weeds and debris
- Refilling gaps between stones or pavers
- Checking for erosion or drainage issues
Common issues include weed growth and erosion, which can be addressed through regular maintenance and by using appropriate materials. For gravel paths, consider applying a weed barrier or a fresh layer of gravel annually. For stone or paver paths, ensure the gaps are filled securely to prevent shifting.
Encourage yourself to adapt and evolve your pathways over time. As your garden grows and changes, so too can your pathways. Adding new plants, changing the layout, or incorporating new materials can keep your outdoor space fresh and inviting for years to come.
Conclusion
Creating budget-friendly DIY pathways in your outdoor space offers numerous benefits, from enhancing aesthetics to improving functionality. With the right materials, a bit of planning, and some creativity, you can transform your garden into a personalized haven that reflects your style.
As you embark on your pathway creation journey, take inspiration from the ideas presented in this article. Don’t hesitate to experiment and let your imagination guide you. We invite you to share your own DIY pathway projects and improvements, embracing the creativity that outdoor design allows.
Now is the perfect time to roll up your sleeves and get started on your outdoor transformation. Your garden awaits!
Frequently Asked Questions
What materials are best for a DIY pathway?
When choosing materials for a DIY pathway, consider options like gravel, reclaimed wood, stone, or concrete pavers. Gravel is particularly cost-effective and offers excellent drainage, while stone paths provide a timeless look. Reclaimed wood adds a rustic charm, and concrete pavers are durable and versatile. Your choice should depend on your budget, style, and the overall theme of your garden.
How do I ensure proper drainage for my pathway?
To ensure proper drainage for your pathway, start by excavating the area to create a slight slope away from any structures. Use landscape fabric to prevent weeds and allow water to drain through. If using gravel, make sure it’s compacted well and consider adding drainage channels if your pathway is extensive. Regular maintenance, such as raking and refilling, will also help maintain proper drainage.
Can I use recycled materials for my pathway?
Absolutely! Using recycled materials for your pathway not only saves money but also adds a unique character to your outdoor space. Old bricks, leftover wood, and stones from landscaping projects can all be repurposed. Be creative with your designs, and don’t hesitate to mix materials for a more eclectic look.
How can I add lighting to my pathway?
You can easily add lighting to your pathway by using solar-powered lights, which are cost-effective and easy to install. Alternatively, consider string lights or lanterns for a warm ambiance. Position the lights along the edges of the pathway to enhance safety and highlight your garden’s features. Ensure the lighting complements your overall garden design for a cohesive look.
What maintenance does a gravel pathway require?
Maintaining a gravel pathway involves regular raking to keep the surface even and removing any debris or weeds that may grow. You may also need to refill gravel in areas that settle over time. Additionally, applying a weed barrier can help reduce maintenance. Regular upkeep will ensure your gravel pathway remains functional and visually appealing.