
Introduction
Spring is a season that breathes new life into everything around us, with vibrant blooms and fresh greenery inspiring creativity in countless forms. As we shake off the winter chill, many of us feel an urge to revamp our styles, and what better way to express that than through your nails? French nail art, with its timeless elegance, offers a canvas for your creativity. It’s a classic look that never goes out of style, yet it provides endless opportunities for personalization.
Creating your own nail art is not only cost-effective but also allows you to showcase your unique style. The DIY approach means you can experiment with colors and designs that resonate with your personality and the season. So, let’s dive into the world of spring-inspired French nail art and explore how you can craft your unique style this spring.
“Creating a cozy reading nook is all about maximizing comfort in a small space. It’s about intentional design that serves both function and feeling.”
– Interior Design Magazine
Understanding French Nail Art: A Timeless Classic
French nail art is a style that has captivated nail enthusiasts for decades. Traditionally characterized by its clean, natural look with a pale pink base and white tips, this design originated in the 1970s. The concept was created by Jeff Pink, the founder of ORLY, who wanted a quick way for actresses to change their nail colors between scenes. It quickly gained popularity and evolved into the classic French manicure we know today.
Over the years, French tips have undergone numerous transformations. From bold colors to intricate designs, the evolution of French nail art reflects changing fashion trends. The traditional characteristics remain, but variations now include colors beyond the classic white, such as vibrant hues, glitter, and even intricate nail art.
Key features of traditional French manicures include:
- A nude or soft pink base color
- White tips that are either rounded or squared
- A glossy top coat for shine
Today’s popular variations include ombre French tips, where the color fades from the base to the tip, and reverse French tips, where the color is applied at the base of the nail rather than the tip. With so many options, you can create a look that is distinctly yours.
Spring Color Palette: Choosing Your Shades
As nature bursts into color during spring, you’ll want to reflect that vibrancy in your nail art. Trending spring colors often include soft pastels, lively florals, and bright hues that evoke feelings of warmth and renewal. Think shades like blush pink, lavender, mint green, and sunny yellow. These colors can be combined or used individually to create stunning nail designs.
When selecting colors, consider how they complement each other. You might want to create a harmonious look by choosing colors next to each other on the color wheel. For instance, pairing a light blue with a soft lavender can create a serene spring vibe. On the other hand, contrasting colors, like a bright coral with a teal, can make your design pop.
The quality of your nail polish is equally important. Investing in a good brand can significantly impact the finish and longevity of your nail art. Look for polishes that offer good coverage and a smooth application. Crafting a color palette that reflects your personal style not only enhances your nail art but also boosts your confidence as you show off your spring-inspired designs.
Essential Tools and Materials for DIY Nail Art
Embarking on your DIY nail art journey requires a few essential tools and materials to ensure you achieve the best results. Here’s a list of must-have items for your nail art kit:
| Tool/Material | Purpose | Recommended Brands |
|---|---|---|
| Nail Polish | Base, color, and top coat | OPI, Essie, Sally Hansen |
| Nail Brushes | For detailed designs | Born Pretty, Kolinsky |
| Dotting Tools | Create dots and patterns | Any basic brand |
| Nail Files and Buffers | Shape and smooth nails | Generic brands |
| Top Coat | Seal and protect designs | Seche Vite, Essie Gel Couture |
In addition to these tools, don’t forget about your nail care products. A good base coat is essential for protecting your nails, while a quality top coat ensures your designs last longer. Nail strengtheners can also help maintain healthy nails, which is particularly important if you’re frequently applying polish.
Setting up a dedicated DIY nail art workspace can enhance your creativity. Find a well-lit area with a clean surface to work on. Organizing your tools and materials will help you feel more prepared and inspired as you create your spring masterpieces.
Step-by-Step Guide to Creating Spring-Inspired French Tips
Ready to dive into creating your spring-inspired French tips? Follow this step-by-step guide to achieve a beautiful look that you can proudly showcase.
1. Preparing Your Nails: Start by cleaning your nails thoroughly. Trim and file them to your desired shape, and use a buffer to smooth the surface. This prep work ensures a clean canvas for your nail art.
2. Applying the Base Coat: After preparing your nails, apply a base coat to protect them from staining and to help the polish adhere better. Choose a soft pink or nude shade for your base color—this will allow your French tips to stand out beautifully.
3. Creating French Tips: There are several methods to create French tips. If you’re confident, you can use a fine nail brush to paint the tips freehand. Alternatively, use the tape method—apply strips of tape to the area where you want the tip to end, paint the tips, then carefully remove the tape for a clean line.
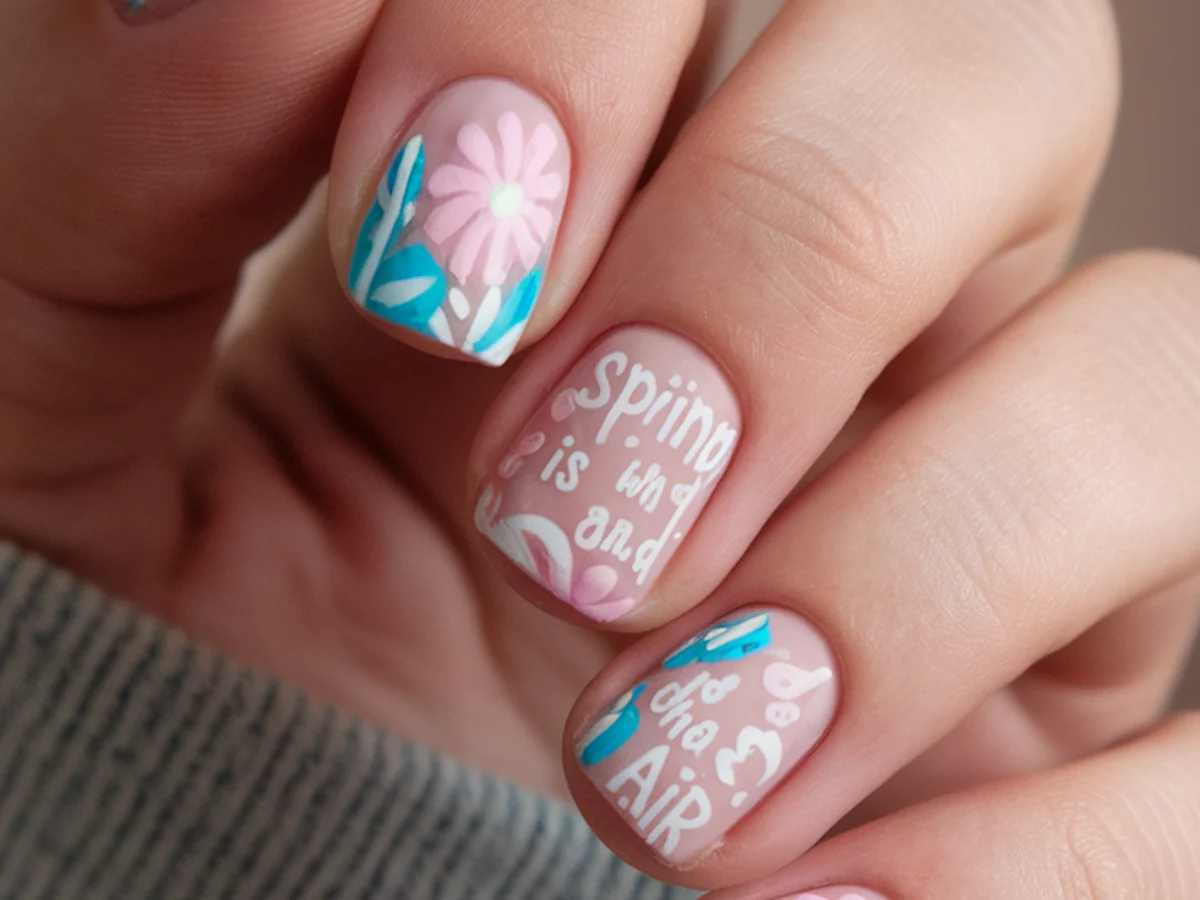
4. Adding Spring-Inspired Designs: This is where your creativity can shine! Consider adding delicate floral designs, butterflies, or abstract patterns using your dotting tools or brushes. For florals, you can create small blossoms at the base of your nail or adorn the tips with tiny flowers.
5. Finishing Touches: Once you’ve completed your designs, apply a top coat to seal and protect your nail art. This not only adds shine but also prolongs the life of your creation.
With each step, you’ll find that the process is as enjoyable as the final result. Don’t hesitate to experiment with different colors and designs until you find what resonates with you.
Incorporating Nail Art Techniques for a Unique Touch
While the classic French tip is beautiful on its own, adding some nail art techniques can elevate your design to the next level. Here are a few methods to incorporate into your spring-inspired nail art:
– Stamping: Nail stamping allows you to create intricate designs quickly. Using a stamping plate and a scraper, you can transfer detailed patterns onto your nails. This technique is great for those who may struggle with freehand painting.
– Sponging: This technique is perfect for creating beautiful gradients. Use a makeup sponge to dab different colors onto your nails, blending them for a soft ombre effect. This can be particularly striking when used with pastel shades typical of spring.
– Water Marbling: For a more adventurous approach, water marbling creates stunning, swirling designs. Drop different colored polishes onto the surface of a bowl of water, and use a toothpick to swirl them together. Dip your nail into the water, and you’ll have a unique design.
– Nail Stickers and Decals: If you want an easier way to add flair, consider using nail stickers or decals. They come in various designs and can be applied after your base color, allowing you to achieve intricate looks without the hassle of painting them yourself.
– Blending Colors: Experiment with blending colors to create unique effects. Using a small brush, you can mix two colors at the tips or base of your nails for a custom look that reflects your personality.
Above all, remember that creativity and experimentation are key in nail art. Don’t be afraid to try new techniques and develop your unique style.
Spring Nail Care: Keeping Your Designs Fresh
Once you’ve created your beautiful spring-inspired nail art, maintaining the health of your nails is crucial. Here are some best practices to keep your nails looking their best:
1. Nail Health: Ensure you’re using a good base coat and top coat regularly to protect your nails. Consider incorporating a nail strengthener into your routine, especially if you frequently use nail polish.
2. Longevity of Nail Art: To prolong the life of your nail art, avoid soaking your hands in water for extended periods. Wear gloves when doing chores, and try to limit exposure to harsh chemicals.
3. Recommended Products: Use moisturizing products for your cuticles and nails. Cuticle oils and creams can help prevent dryness and cracking, keeping your nails healthy and vibrant.
4. Removing Nail Art: When it’s time to remove your nail art, do so gently. Use an acetone-free remover to avoid damaging your nails. Soak a cotton ball in remover, place it on your nail, and wrap it in foil. Allow it to sit for a few minutes before gently wiping away the polish.
By following these tips, you’ll not only keep your nail art looking fresh but also promote strong and healthy nails.
Inspiration from Nature: Spring Themes for Nail Art
Nature provides endless inspiration for your spring nail art designs. As flowers bloom and the world awakens, consider incorporating these themes into your creations:
– Floral Motifs: Use small flowers, leaves, or vines to create a nature-inspired look. You can paint tiny daisies or rosebuds on your nails or use stamping techniques to apply floral patterns.
– Landscapes: Create a scenic landscape by painting a sunset or a meadow on your nails. This allows for creativity and can be a fun way to showcase your artistic skills.
– Animal Patterns: Incorporate animal motifs, such as butterflies or birds, to celebrate the vibrant life of spring. These designs can be simple or complex, depending on your skill level.
– Seasonal Events: Draw inspiration from seasonal events like Easter or garden parties. Think pastel colors and playful designs that capture the joy of spring celebrations.
– Personal Experiences: Reflect on your personal experiences and memories related to spring. Perhaps a favorite flower or a memorable spring trip can inspire your nail designs. This personal touch will make your art even more meaningful.
Once you’ve created your designs, don’t forget to showcase them on social media! Engaging with a community of nail art enthusiasts can provide you with feedback, inspiration, and a sense of camaraderie.
Troubleshooting Common DIY Nail Art Issues
As you begin your DIY nail art journey, you may encounter a few common challenges. Here are some tips to help you troubleshoot and overcome these issues:
– Bubbles in Polish: If you notice bubbles in your polish, this can be due to shaking the bottle. Instead, roll the bottle between your palms to mix the polish gently.
– Smudges: To avoid smudges, ensure that each layer of polish is completely dry before applying the next. Using a quick-dry top coat can help speed up this process.
– Uneven Tips: If your French tips turn out uneven, don’t fret! You can use a small brush dipped in polish remover to clean up the edges and create a smoother line.
– Chipping: To prevent chipping, always use a base coat and top coat. Avoid using your nails as tools, and be mindful of your activities to keep your designs intact.
– Patience is Key: Nail art takes practice, and it’s important to be patient with yourself. Embrace imperfections as part of the creative process, and remember that each attempt will improve your skills.
With these tips in mind, you can tackle any challenges that arise and enjoy the journey of creating beautiful nail art.
Conclusion
Creating your own spring-inspired French nail art is a delightful way to express your individuality and celebrate the season. From understanding the history of French nail art to exploring various techniques and color palettes, you have the power to craft designs that reflect your unique style.
Embrace the joy of experimentation, and don’t hesitate to share your creations with others. By showcasing your nail art, you not only inspire yourself but also motivate others in the community. So, gather your tools, let your creativity flow, and dive into the vibrant world of spring-inspired nail art.
As you continue to explore and develop your skills, remember that there are countless resources and communities available to support you on your journey. Happy crafting!
Frequently Asked Questions
What are the best colors for spring nail art?
Spring nail art often features soft pastels, bright florals, and vibrant hues like blush pink, mint green, lavender, and sunny yellow. These colors reflect the season’s freshness and can be mixed and matched to create beautiful designs.
How can I make my nail art last longer?
To prolong the life of your nail art, use a high-quality base coat and top coat. Avoid soaking your hands in water for extended periods and wear gloves while doing chores. Regularly moisturizing your nails and cuticles can also help maintain their health.
What tools do I need for DIY nail art?
Essential tools for DIY nail art include nail polish, brushes, dotting tools, a nail file, a buffer, and both a base and top coat. Having a well-organized workspace will make the process smoother and more enjoyable.
How do I remove nail art without damaging my nails?
To remove nail art, use an acetone-free nail polish remover. Soak a cotton ball in the remover, place it on the nail, and wrap it with foil for a few minutes. This gentle method helps prevent damage to your nails.
Can I use nail stickers for nail art?
Yes, nail stickers are a great way to add intricate designs without the need for painting. They come in various styles and can be applied after your base color for a quick and easy way to enhance your nail art.