
Introduction: Embrace the Spring Vibe
Spring is a season that inspires renewal, creativity, and a sense of freshness as nature awakens from its winter slumber. It’s also the perfect time to refresh your beauty routine, and what better way to do so than with a classic twist on nail art? French nail art, known for its timeless elegance and versatility, serves as a fantastic canvas for your spring-inspired creativity. Whether you’re a seasoned nail art enthusiast or a curious beginner, this article aims to ignite your imagination and encourage you to explore the vibrant world of DIY French nail art. With playful colors and delightful designs, you can truly unleash your creativity this spring!
“Creating a cozy reading nook is all about maximizing comfort in a small space. It’s about intentional design that serves both function and feeling.”
– Interior Design Magazine
Understanding the Basics of French Nail Art
French nail art is characterized by its clean lines and sophisticated finish, typically featuring a natural nail bed with a white tip. This classic design has stood the test of time, making it a beloved choice for many. To begin your DIY journey, you’ll need a few essential tools and materials: a base coat, a couple of nail polish colors (a nude or light pink for the base and white or pastel for the tips), a top coat for shine, and tools such as nail tape, a thin brush, or even a dotting tool for added precision.
Before you dive into painting, proper nail preparation is key. Start by cleaning your nails to remove any oils or residue. Shape your nails into your desired form—whether it’s square, almond, or stiletto—using a nail file. Then, apply a base coat to protect your natural nails and create a smooth surface. The traditional French manicure looks best on oval or square nail shapes, but feel free to experiment with what suits your style!
Spring Colors: Choosing Your Palette
Spring is all about vibrant colors and cheerful vibes, making it the perfect time to play with your nail art palette. This season, you’ll find popular trends leaning towards soft pastels, lively florals, and bright hues that encapsulate the joyous essence of spring. Think soft lavender, mint green, pale yellow, and blush pinks that evoke the blooming flowers and clear skies of the season.
When selecting your color combinations, consider pairing soft hues with bolder accents for a delightful contrast. For instance, a pale pink base with bright coral tips can create a stunning effect. It’s also crucial to choose complementary colors that enhance each other rather than clash. Opt for high-quality nail polish brands known for their durability and finish, such as OPI, Essie, or Sally Hansen, to ensure your designs last longer and look fabulous.
Creating Your DIY French Nail Art: Step-by-Step Guide
Ready to create your DIY French nail art? Follow this step-by-step guide to achieve a flawless look:
1. Prep Your Nails: Start with clean, shaped nails and apply a base coat to protect them.
2. Apply Base Color: Choose a nude or light pink polish for your base. Apply one or two coats for a smooth finish, allowing each layer to dry completely.
3. Create the Tips: For the classic French tip, you can either use a thin brush or nail tape to create a straight line. If you’re using tape, place it across your nail, leaving the tip exposed. Apply your chosen tip color (white or any vibrant spring shade) and let it dry.
4. Remove the Tape: Carefully peel off the tape to reveal your clean lines.
5. Finishing Touches: Apply a top coat to seal in your design and add shine. For added flair, consider using tiny gems or glitter at the base of your nails.
6. Drying and Curing: Allow your nails to dry completely to avoid smudging. Using a UV lamp for gel polish can also enhance durability.
With these steps, you’ll have stunning French nails that reflect the beauty of spring!
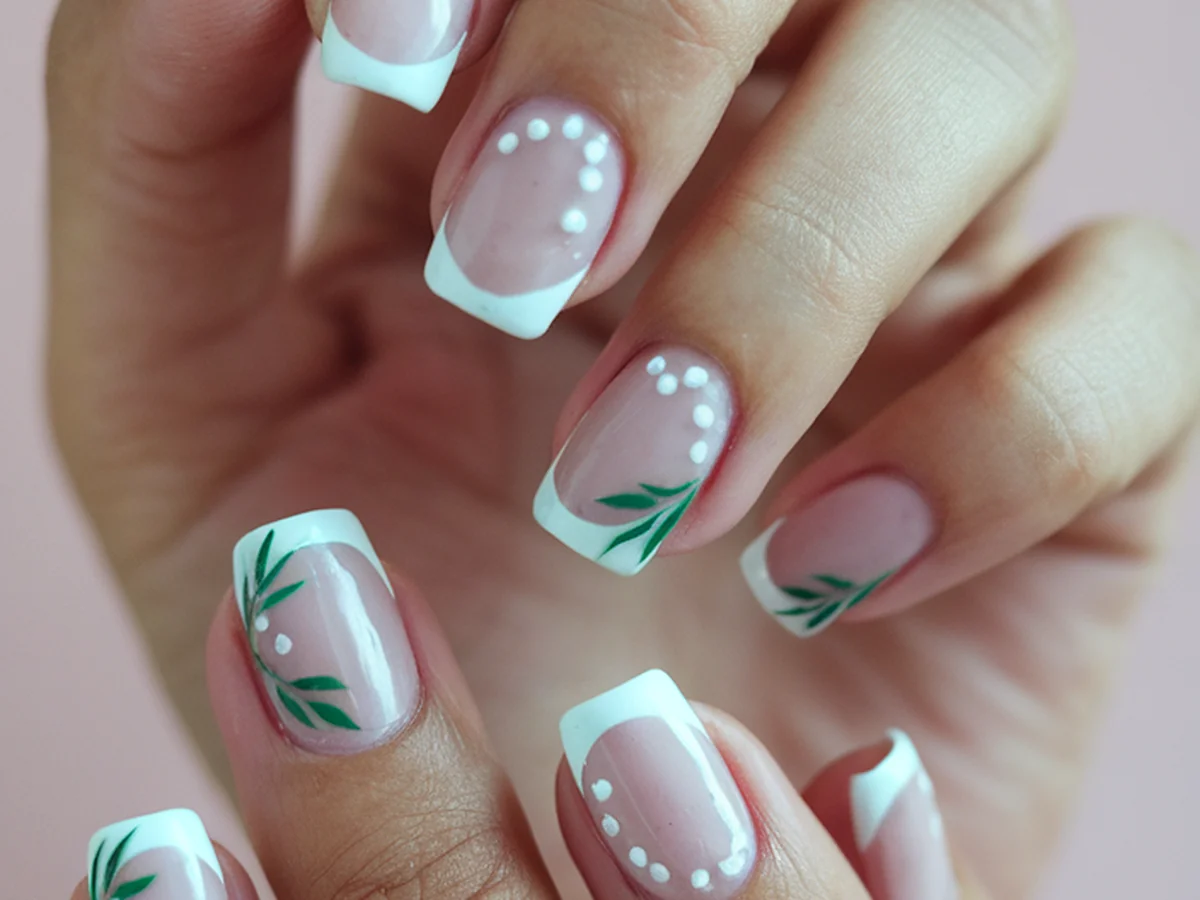
Spring-Themed Designs: Ideas to Get You Started
Now that you have the basics down, let’s explore some enchanting spring-themed designs! You can easily incorporate elements like floral patterns, butterflies, or even ombre effects into your French nail art. For instance, a delicate flower design at the base of your nails can bring a whimsical touch to your manicure.
Consider experimenting with glitter to add a sparkle reminiscent of sunshine on blooming flowers. A gradient effect can also be achieved by blending two or three complementary colors, creating a beautiful ombre look from the base to the tips. For intricate designs, nail art pens can be a game changer, allowing you to draw fine lines and detailed patterns with ease.
Here are a few design ideas to inspire you:
– Floral French Tips: Paint tiny flowers on the tips of your nails using a fine brush.
– Butterfly Accents: Create butterfly motifs on one or two accent nails for a playful touch.
– Glitter Ombre: Start with a solid base color and blend in glitter towards the tips for a dazzling effect.
Let your imagination run wild—spring is all about expressing yourself!
Nail Art Tools: Must-Haves for Every DIYer
To elevate your DIY nail art game, having the right tools is essential. Here’s a list of must-have tools for your nail art kit:
| Tool | Purpose | Recommendations |
|---|---|---|
| Nail Brushes | For detailed designs and clean lines | Look for a set with various sizes |
| Dotting Tools | Create dots and intricate patterns | Available in different sizes |
| Nail Tape | For creating straight lines on your nails | Choose a variety of widths |
| Sponges | For ombre and gradient effects | Makeup sponges work well |
| Top Coat | Seal and protect your design | Choose a fast-drying formula |
In addition to these essentials, optional tools like nail stamps and stripers can take your designs to the next level. Remember to clean and maintain your tools regularly to ensure they last for many spring nail art sessions to come. If you’re on a budget, consider sourcing tools from craft stores or online retailers that offer affordable options.
Caring for Your Spring Nail Art: Tips for Longevity
After putting in the effort to create stunning nail art, it’s essential to care for your masterpiece to avoid chipping and ensure longevity. Here are some valuable tips to keep your nails looking their best:
1. Use a Top Coat: Always finish with a high-quality top coat for added shine and protection. This step is crucial in preventing chips and prolonging the life of your nail art.
2. Avoid Water Exposure: Try to minimize exposure to water for the first few hours after painting. If you need to do dishes or wash your hands, consider wearing gloves.
3. Regular Nail Care: Keep your nails healthy by maintaining a regular nail care routine. This includes trimming and filing your nails, moisturizing your cuticles, and applying nourishing oils.
4. Handle with Care: Be cautious with your hands to avoid unnecessary impacts that can chip your polish.
5. Moisturize: Keep your cuticles and nails hydrated with a good cuticle oil or hand cream to prevent dryness and breakage.
By following these tips, you can ensure that your spring nail art will stay vibrant and intact for an extended period!
Showcasing Your Creations: Sharing on Social Media
Once you’ve crafted your beautiful spring nail art, why not share your creations with the world? Documenting your nail art journey is a fantastic way to showcase your creativity and connect with other enthusiasts. Here are some tips on how to take great photos of your nail art for social media:
– Lighting Matters: Natural light is your best friend! Try to take photos in well-lit areas to capture the true colors and details of your designs.
– Find Your Angle: Experiment with different angles to highlight your nail art. Close-ups can show off intricate details, while wider shots can capture the overall look.
– Use Hashtags: When sharing your work, consider using popular hashtags like #NailArt, #SpringNails, #DIYNailArt, and #NailInspo to connect with a larger audience.
– Engage with the Community: Don’t hesitate to interact with other nail art lovers! Comment on their posts, join nail art groups, and share ideas to inspire one another.
The nail art community is vibrant and filled with creativity. Engaging with others can help fuel your passion and inspire new ideas!
Inspiration from Nature: Drawing Ideas from the Outdoors
Spring is a season of breathtaking beauty, and there’s no shortage of inspiration to be found in nature. From the delicate petals of blooming flowers to the vibrant greens of new leaves, the outdoors can spark countless ideas for your nail art designs. Consider visiting local gardens, parks, or even your backyard to observe the colors and patterns of nature.
You can translate these natural elements into your nail art by using floral motifs, earthy tones, or even abstract designs inspired by the shapes and colors you see. For example, capturing the essence of cherry blossoms with soft pinks and whites can create a stunning spring nail design.
Famous nail artists often draw inspiration from nature, creating stunning pieces that reflect the beauty around them. By observing the world outside your door, you can find unique ideas that resonate with your personal style.
Conclusion: Unleash Your Creativity This Spring
As you embark on your DIY French nail art journey this spring, remember that the key is to embrace your creativity and have fun with the process. From understanding the basics of nail art to exploring vibrant color palettes and intricate designs, the possibilities are endless. Each stroke of polish is an opportunity to express yourself and celebrate the beauty of the season.
So, gather your tools, select your colors, and let your imagination run wild! Don’t forget to share your creations with friends, family, and the nail art community. You might just inspire someone else to pick up a brush and join in on the fun. Happy crafting, and here’s to a spring filled with creativity and stunning nail art!
Frequently Asked Questions
What is a classic French manicure?
A classic French manicure features a natural or nude base color with white tips on the nails. It is loved for its timeless elegance and versatility, making it suitable for any occasion. The design is simple yet sophisticated, allowing for variations in color and style to suit personal preferences.
How can I achieve clean lines for my French tips?
To achieve clean lines for your French tips, you can use nail tape or a thin nail brush. If using tape, apply it to the nail in the desired tip shape before painting. For a brush, practice steady hands and apply the tip color in one stroke. Taking your time and allowing each layer to dry can also help create a polished look.
What are the best colors for spring nail art?
Spring nail art often incorporates soft pastels, bright florals, and refreshing hues that reflect the season’s vibrancy. Popular colors include lavender, mint green, blush pink, and sunshine yellow. You can mix and match these shades or use them in gradients to create eye-catching designs.
How do I maintain my nail art to prevent chipping?
To prevent chipping, always apply a high-quality top coat after your nail art and avoid exposing your nails to excessive water or harsh chemicals. Regularly moisturizing your nails and cuticles also helps maintain their health and appearance. Handle your nails with care to avoid unnecessary impacts that could lead to chips.
Can I use regular nail polish for nail art, or should I invest in special products?
You can absolutely use regular nail polish for nail art! Many high-quality brands offer great pigmentation and durability. However, investing in a few specialized products like nail art pens, brushes, or stamping kits can enhance your designs and make intricate work easier.